Detection
The Detection section allows you to detect objects using trained models, configured scenes, and pick strategies. Before starting detection, make sure the required models, scenes, and pick strategies are available.
Overview
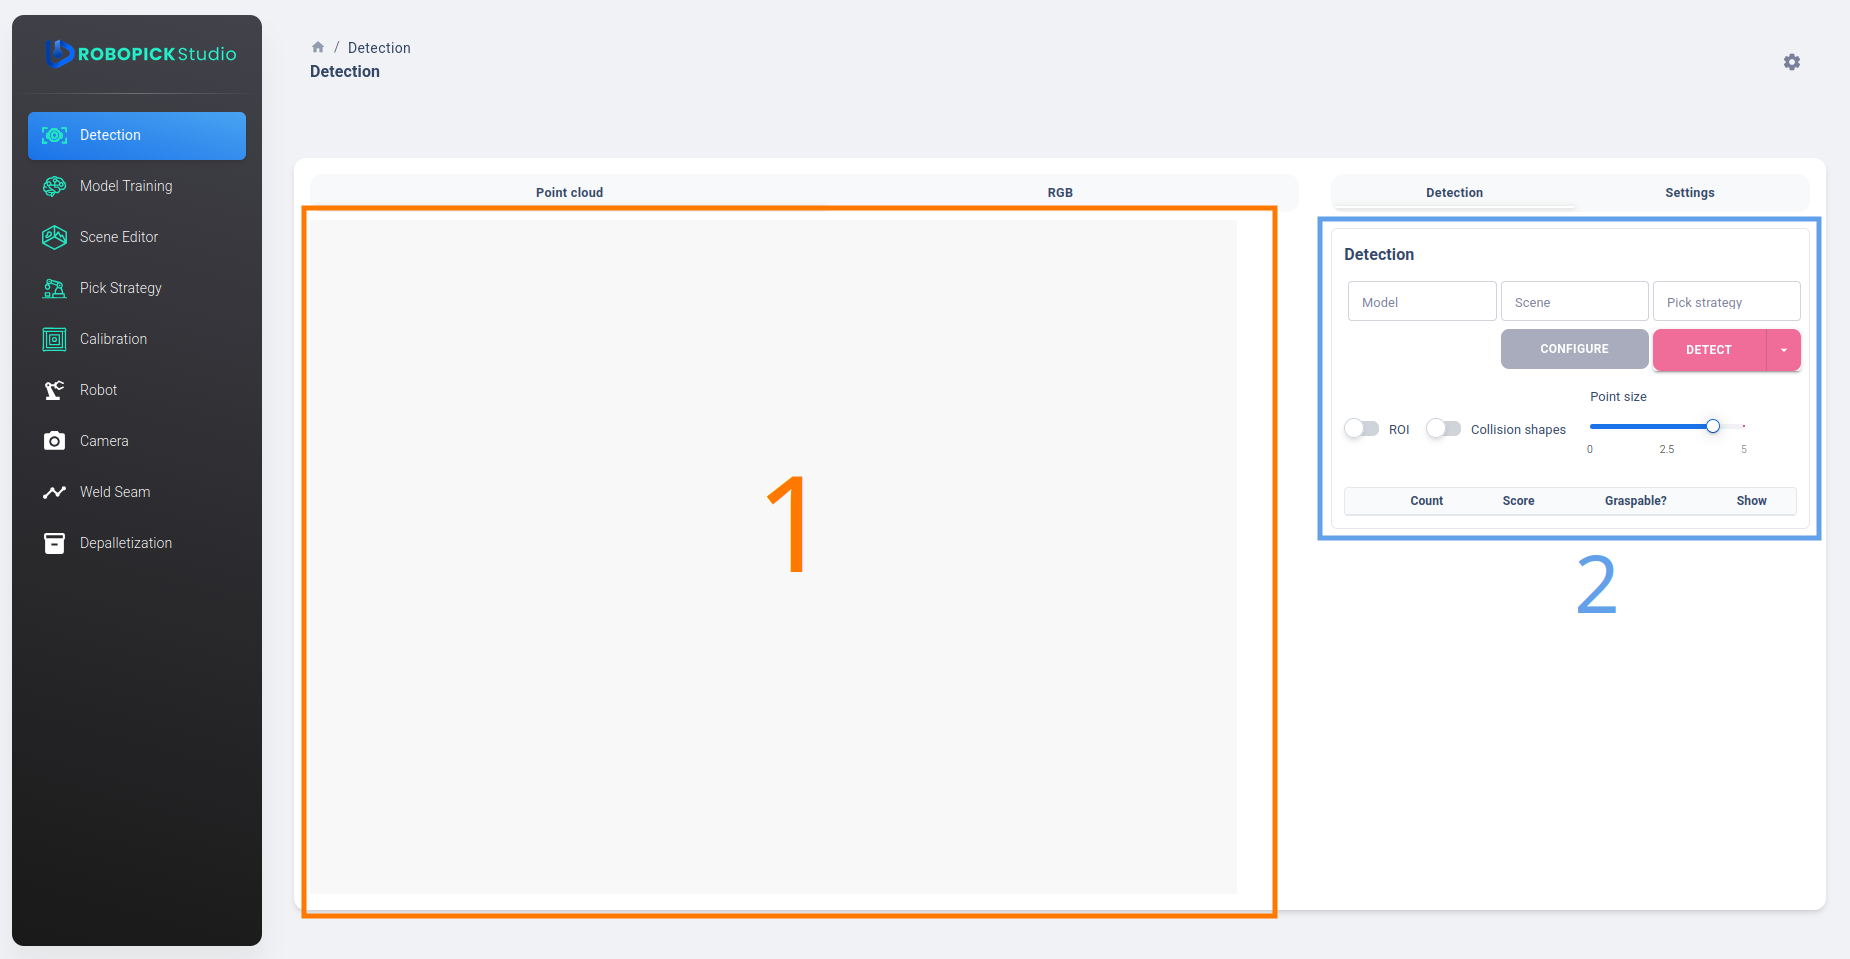
The Detection page provides an interface for configuring and performing object detection, as well as viewing the results. The interface is divided into two main sections, as illustrated in Figure 1. The left section displays the detection results, allowing users to review the output after a detection process has been performed. The right section provides the configuration options, where users can select the model, scene, and pick strategy to define the detection setup.
Detection configuration
The Detection page consists of three main configuration options: Model, Scene, and Pick Strategy. These options determine which object to detect, which scene to use, and which pick strategy to apply during detection.
1. Select a model
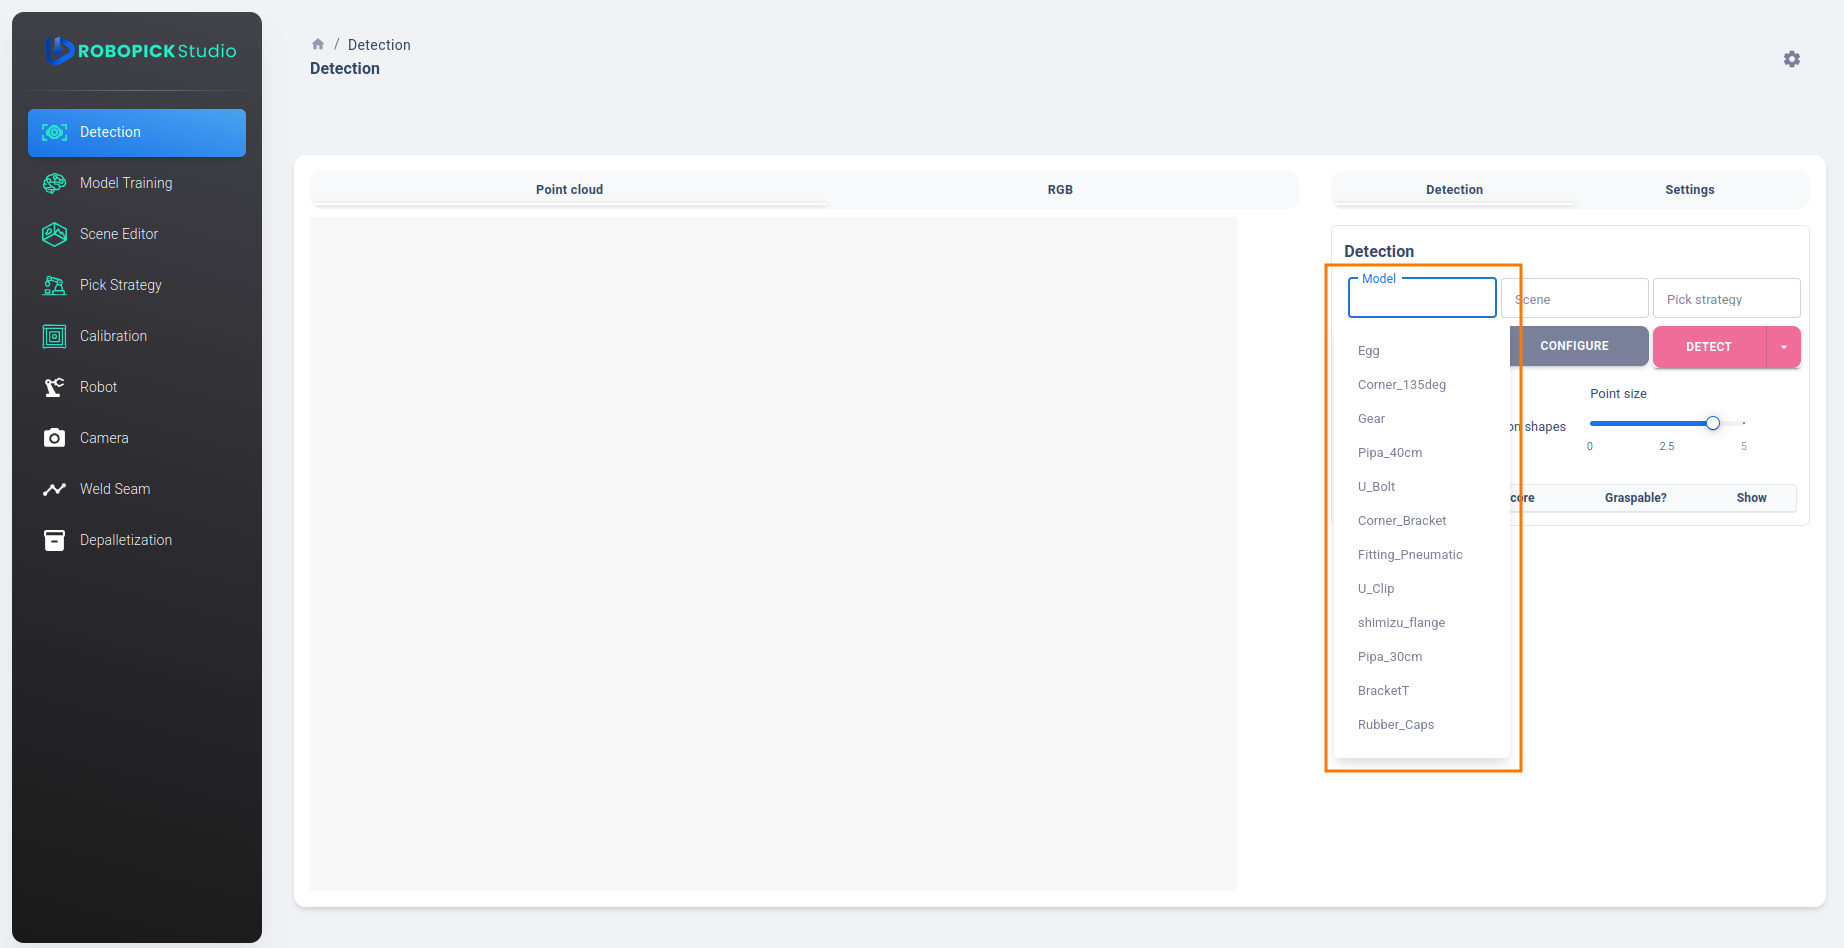
In the Model section, select the object you want RoboPick to detect. The available models are those that have been added through the model training process.
For instructions on adding and training object models, refer to the Teaching Picks section.
2. Select a scene
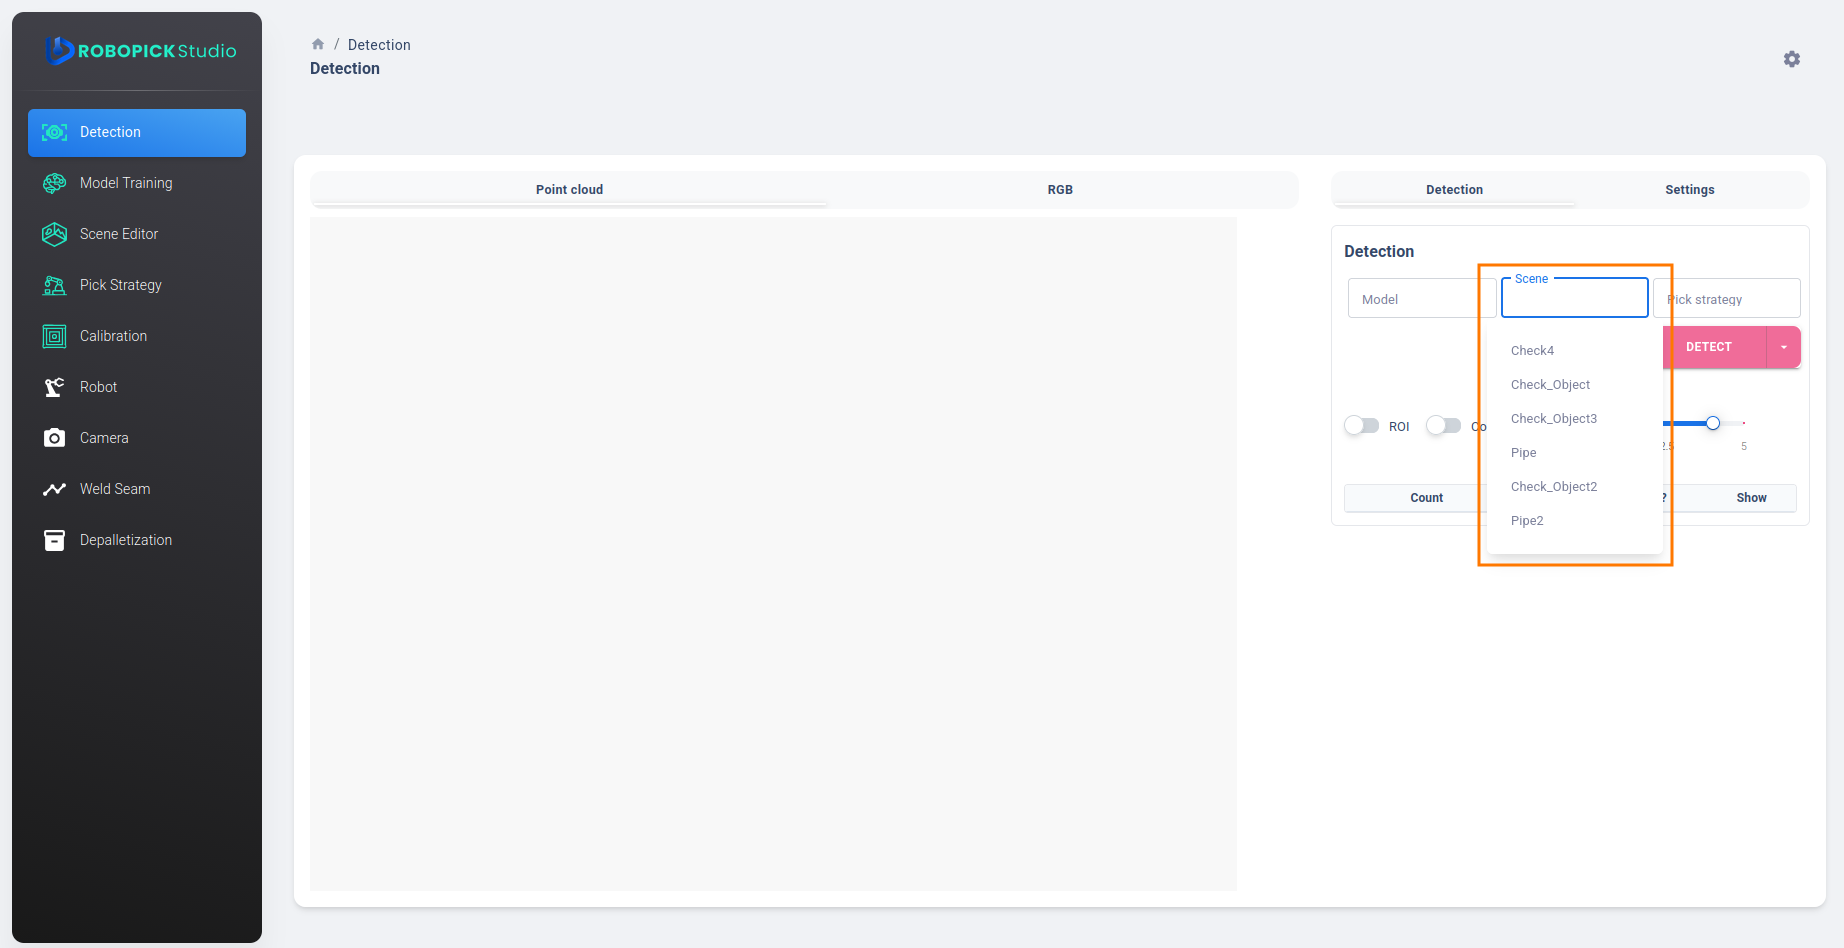
In the Scene section, select the scene you want to use for detection. Make sure to choose the appropriate scene for your setup.
For instructions on adding and managing scenes, refer to the Scene Editor section.
3. Select a pick strategy
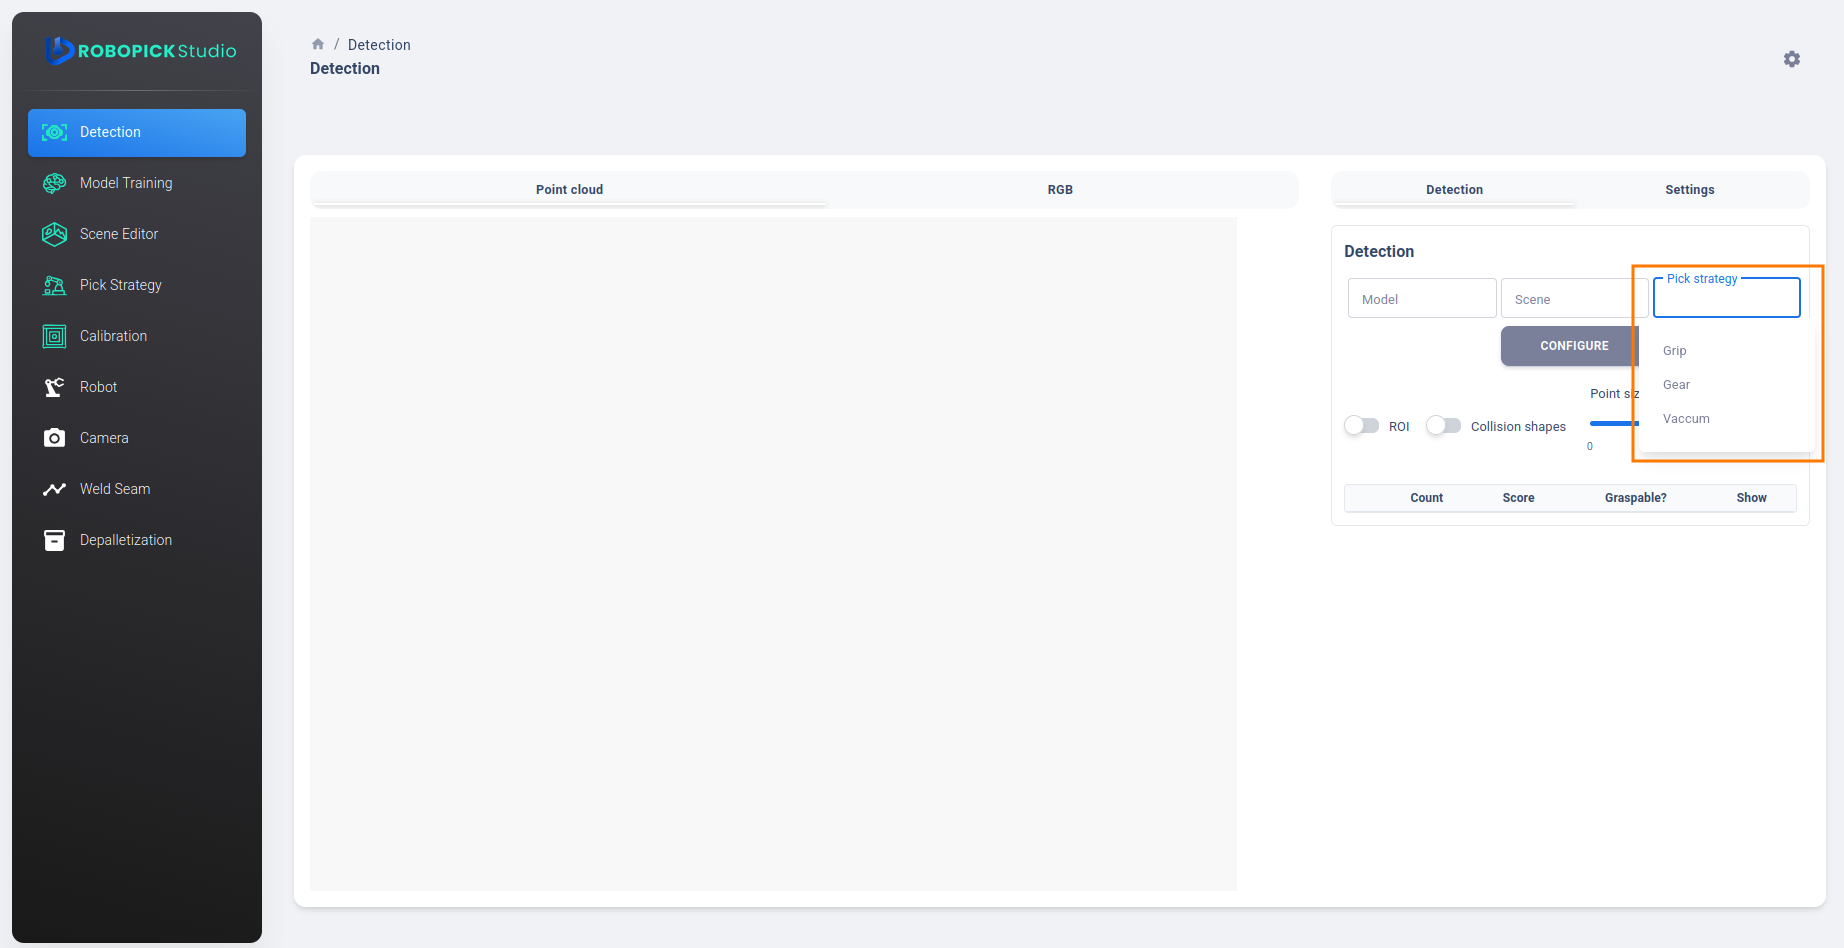
In the Pick Strategy section, select the pick strategy you want to use for the detected object.
For instructions on configuring pick strategies, refer to the Pick Strategy section.
4. Configure detection
After selecting the model, scene, and pick strategy, click the Configure button to apply the selected configuration.
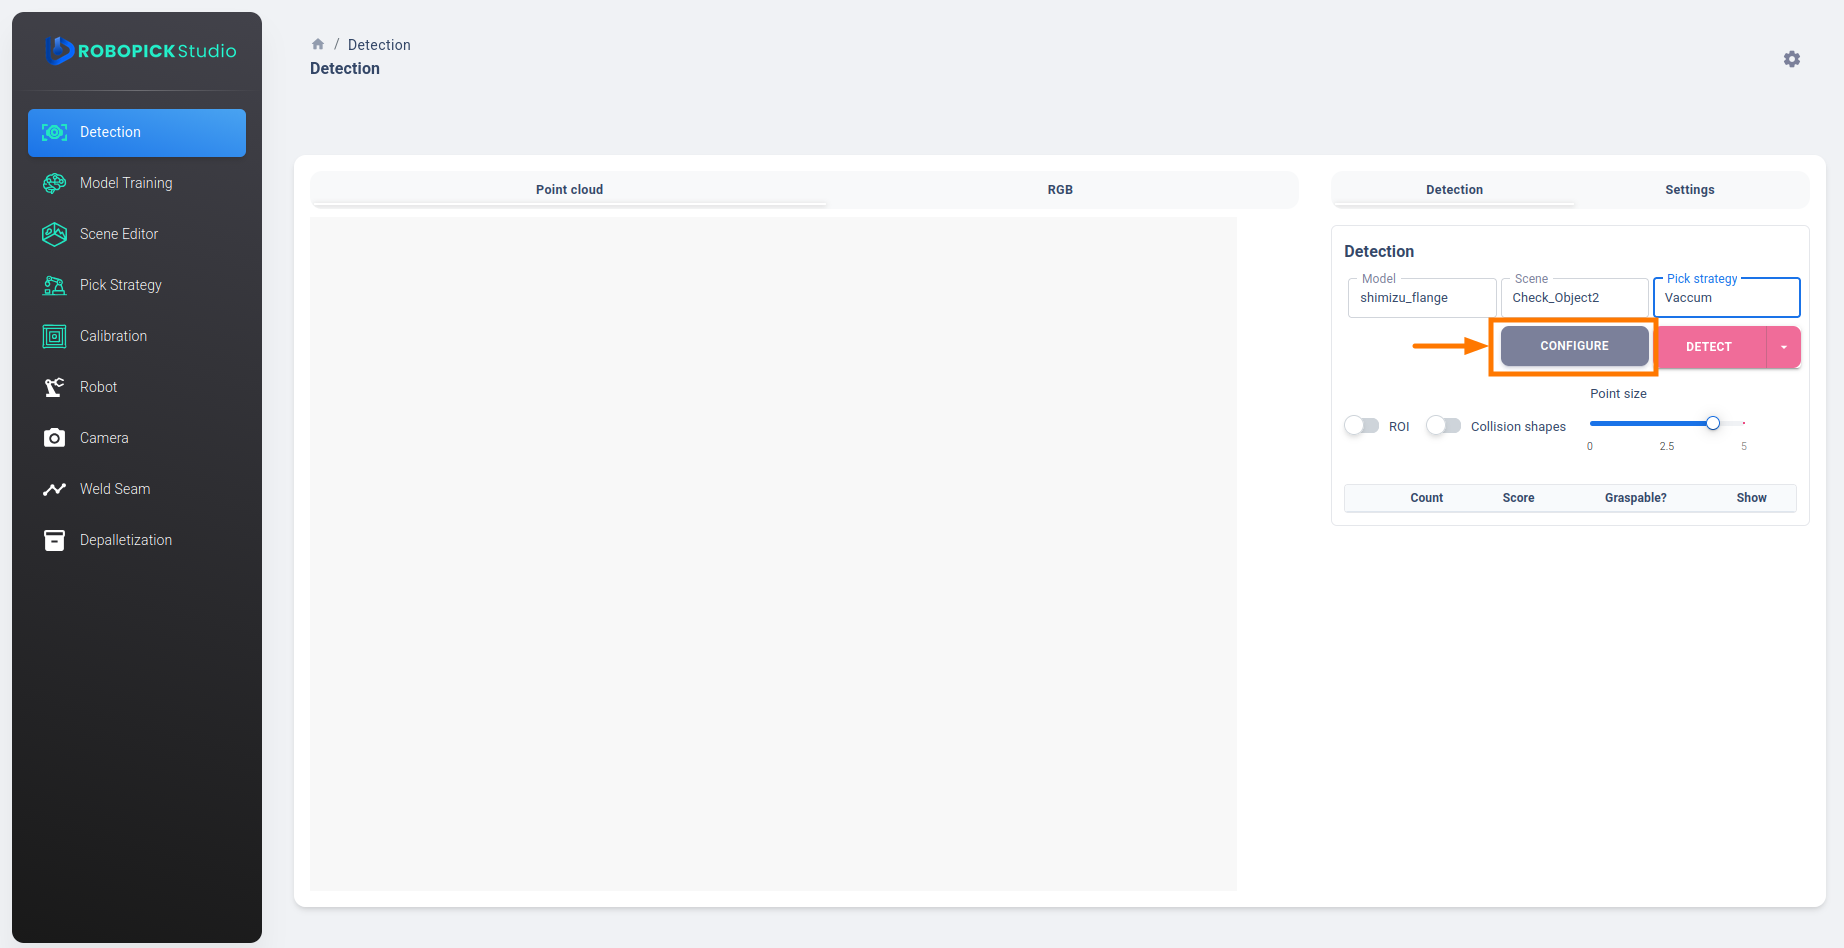
If you change the model, scene, or pick strategy, click the Configure button again to apply the updated configuration before running detection.
5. Run detection
After configuring the detection settings, click the Detect button to start the detection process.
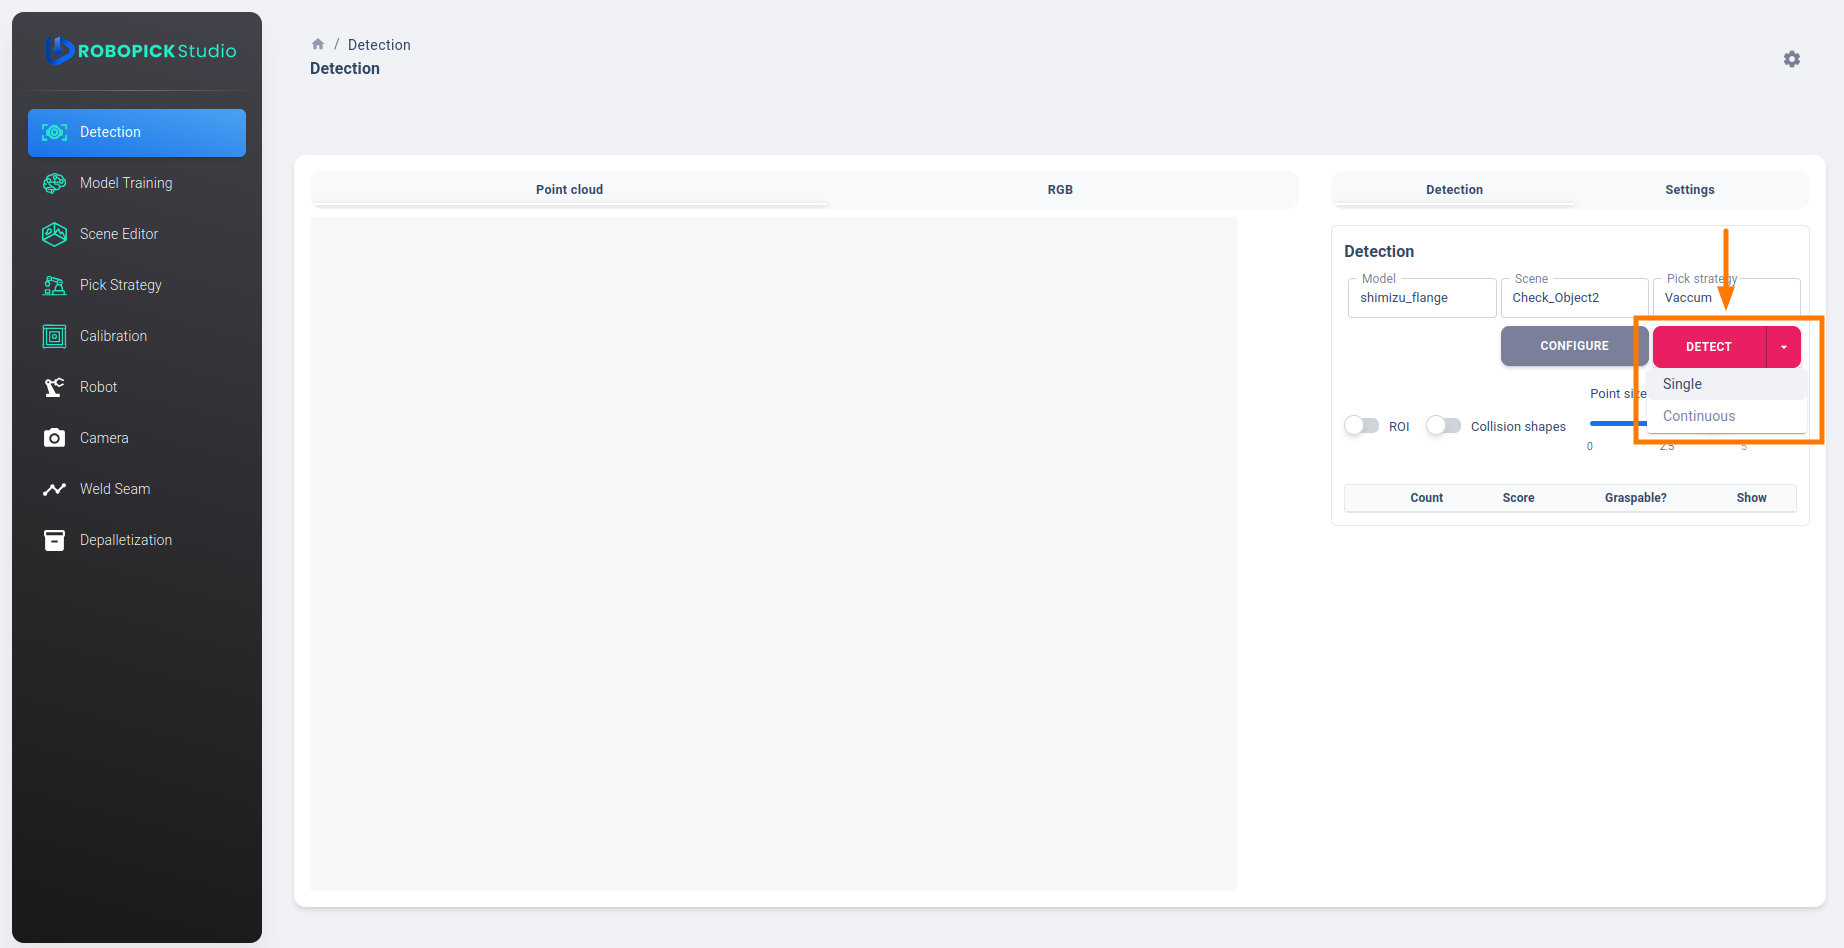
There are two detection modes available from the selector next to the Detect button:
Single
The Single mode performs detection once each time the Detect button is clicked. After the detection process is completed, the resulting output is displayed in the detection results section.
This mode is suitable when you want to inspect a specific scene, verify the detection results, or perform an individual detection without repeatedly processing the scene. It also allows you to review the output before deciding whether another detection is necessary.
Continuous
The Continuous mode repeatedly performs detection while the process is running. Instead of executing detection only once, the system continues processing the scene to provide updated detection results.
This mode is useful when continuous monitoring is required. It allows users to observe detection results across successive detection cycles without manually initiating each run.
Detection Output
After the detection process is completed, RoboPick displays the detection results in the output section. These results provide information about the detected object, including its representation in the point cloud, graspability status, estimated position and orientation, and visualization in the RGB image.
1. Point cloud and detection information
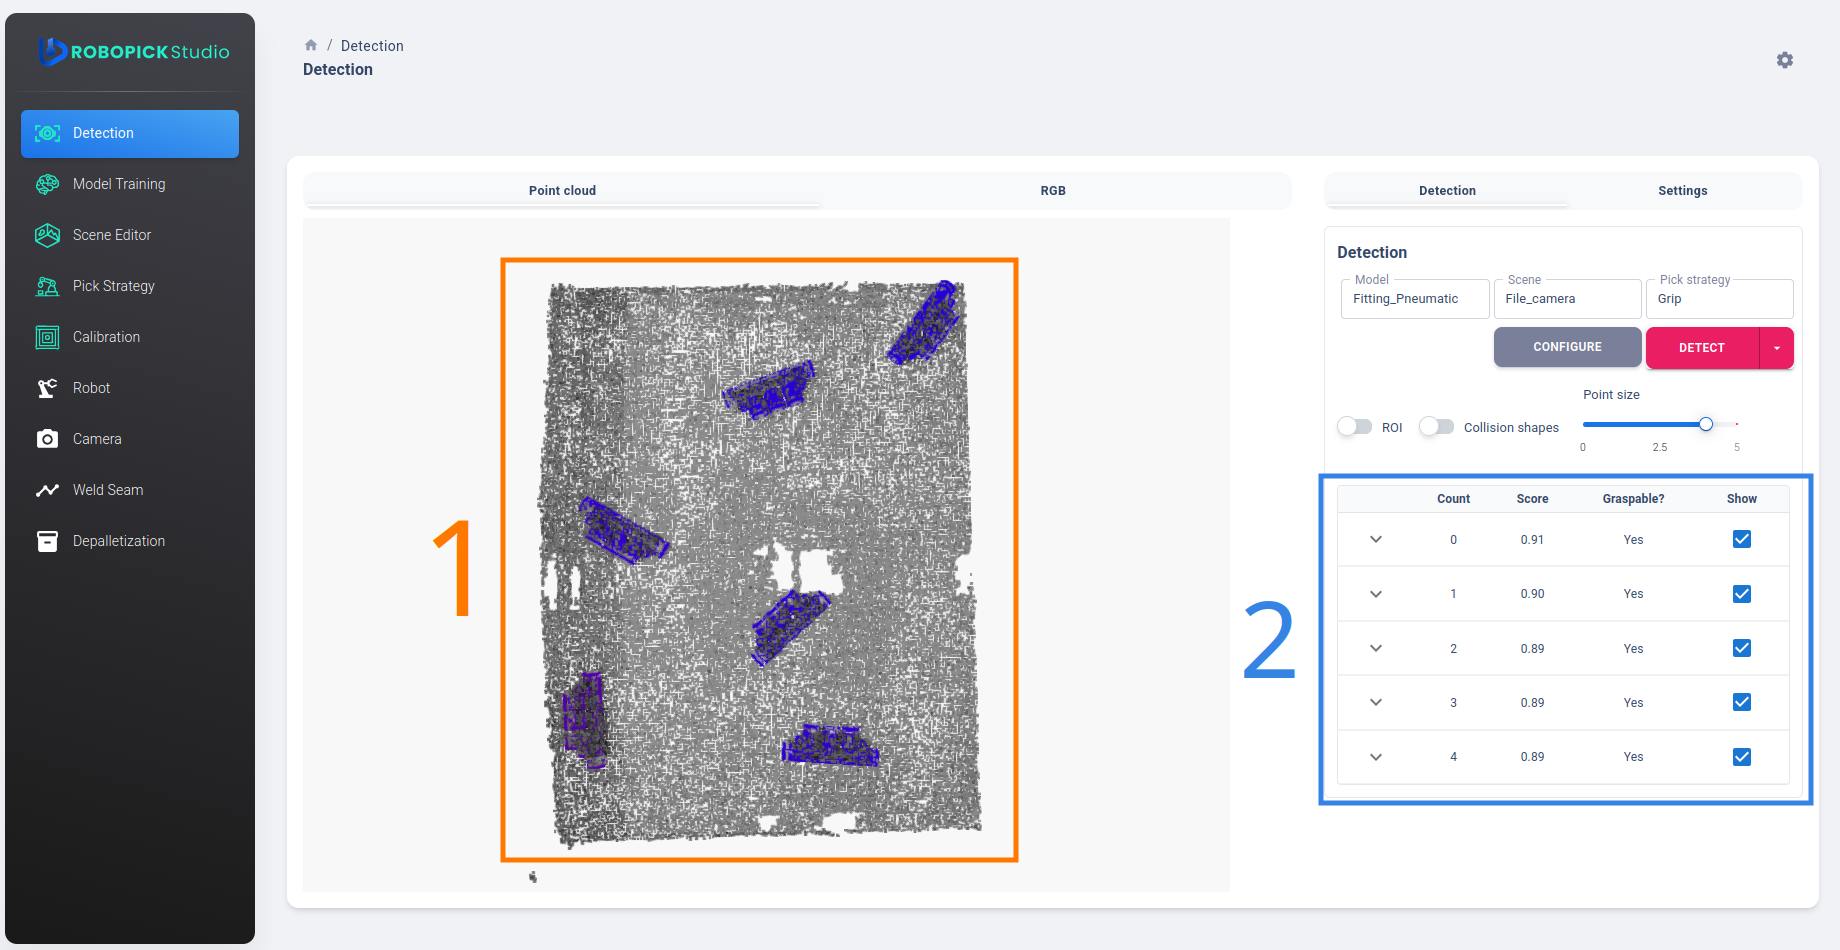
The Point Cloud view provides a three-dimensional representation of the captured scene, allowing users to inspect the spatial data used during detection.
The Detected Object section displays information about the detected object, including its detection score and graspability status. The detection score indicates the model's confidence in the detection result, while the graspability status indicates whether the object is considered suitable for grasping based on the current detection and grasping configuration.
2. Object position and orientation
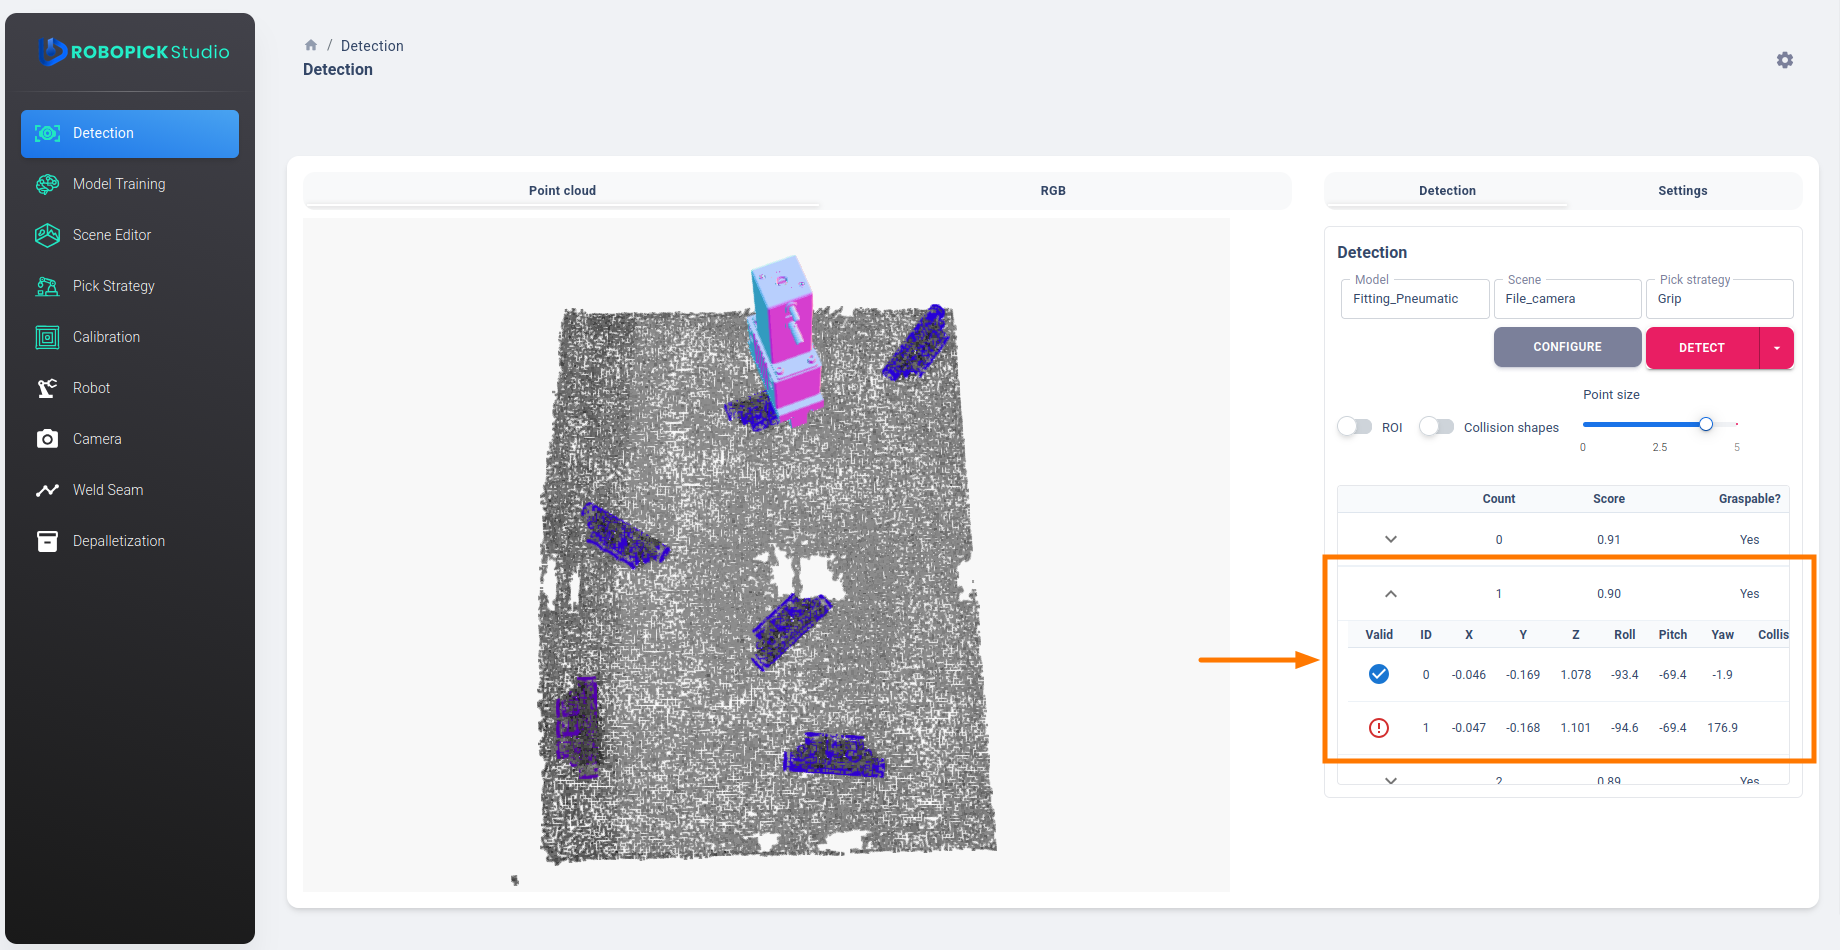
The object's position is represented by the X, Y, and Z coordinates, which describe its location in the coordinate system used by RoboPick. The object's orientation is represented by the Roll, Pitch, and Yaw angles, which describe its rotational alignment around the three axes.
Together, these six values define the detected object's pose. This information can be used to understand the object's spatial placement and orientation for subsequent robotic operations, such as grasp planning and pick execution.
3. RGB image and detected object visualization
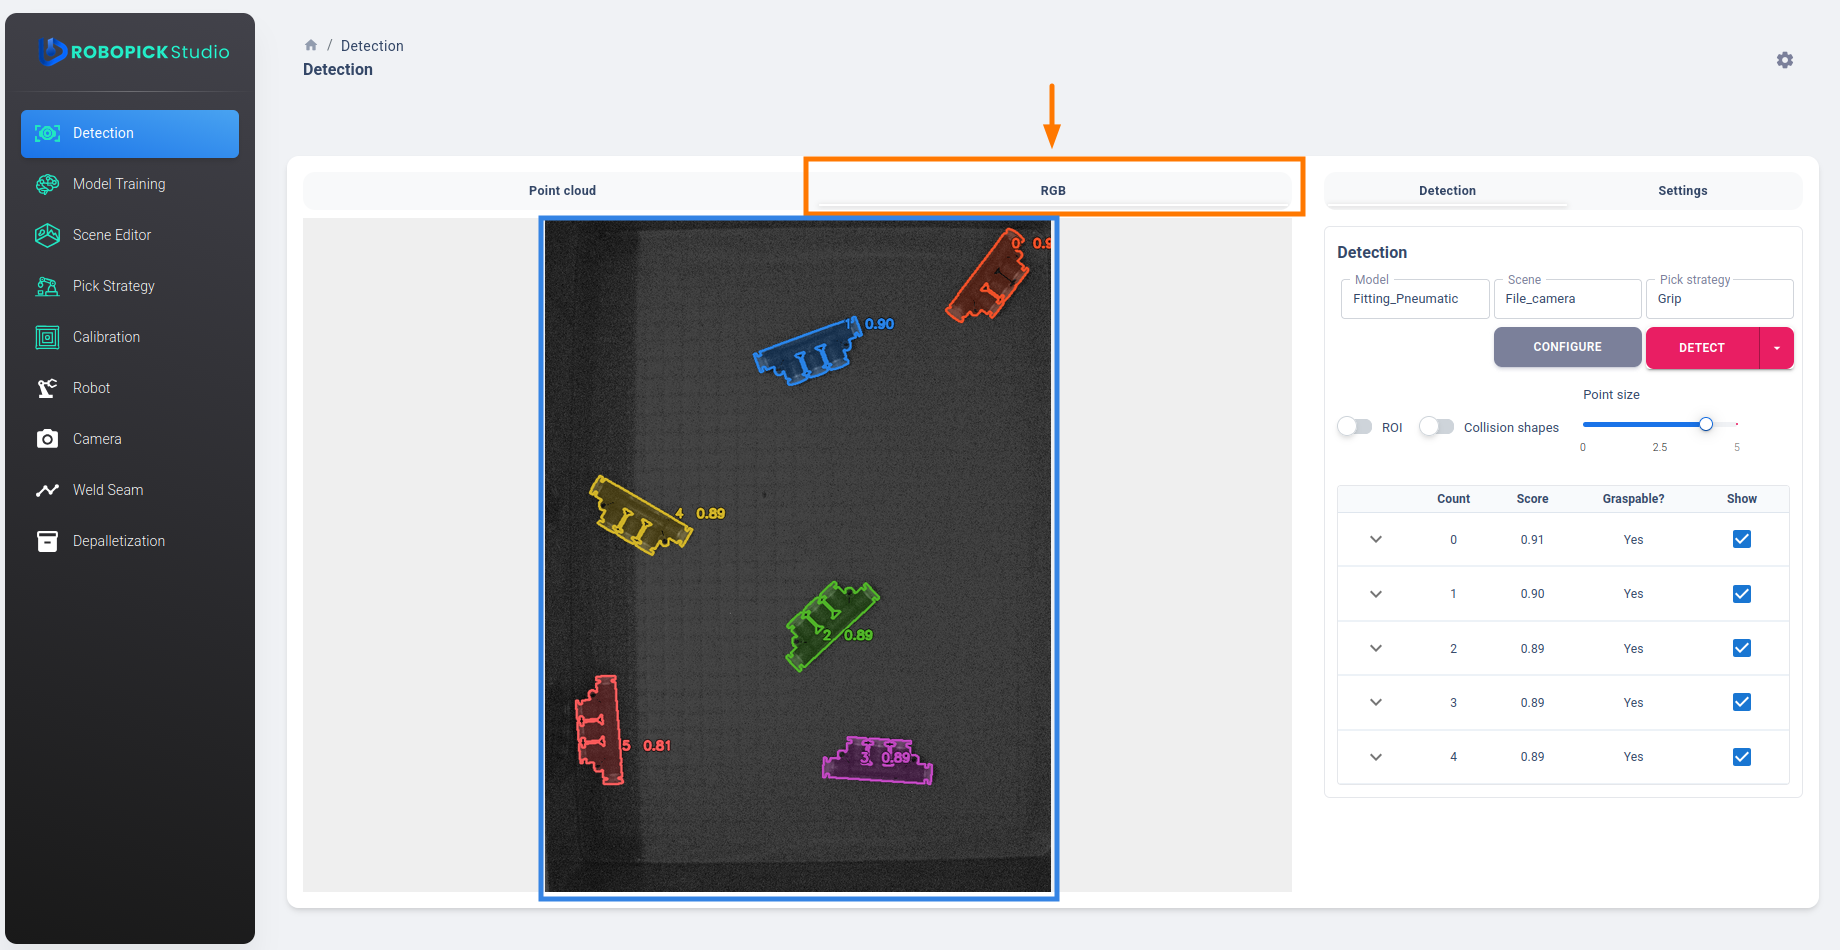
This visualization allows users to compare the detection result with the original scene and verify whether the intended object has been identified correctly. The highlighted region helps distinguish the detected object from the surrounding objects and background.
Detection Settings
Detection performance may vary depending on the environment, lighting conditions, object placement, and other factors. Therefore, the detection parameters may need to be fine-tuned to achieve optimal results in different environments.
To adjust the detection parameters, click the Settings button to access the available configuration options. You can modify the parameters to better suit your environment and improve detection performance.
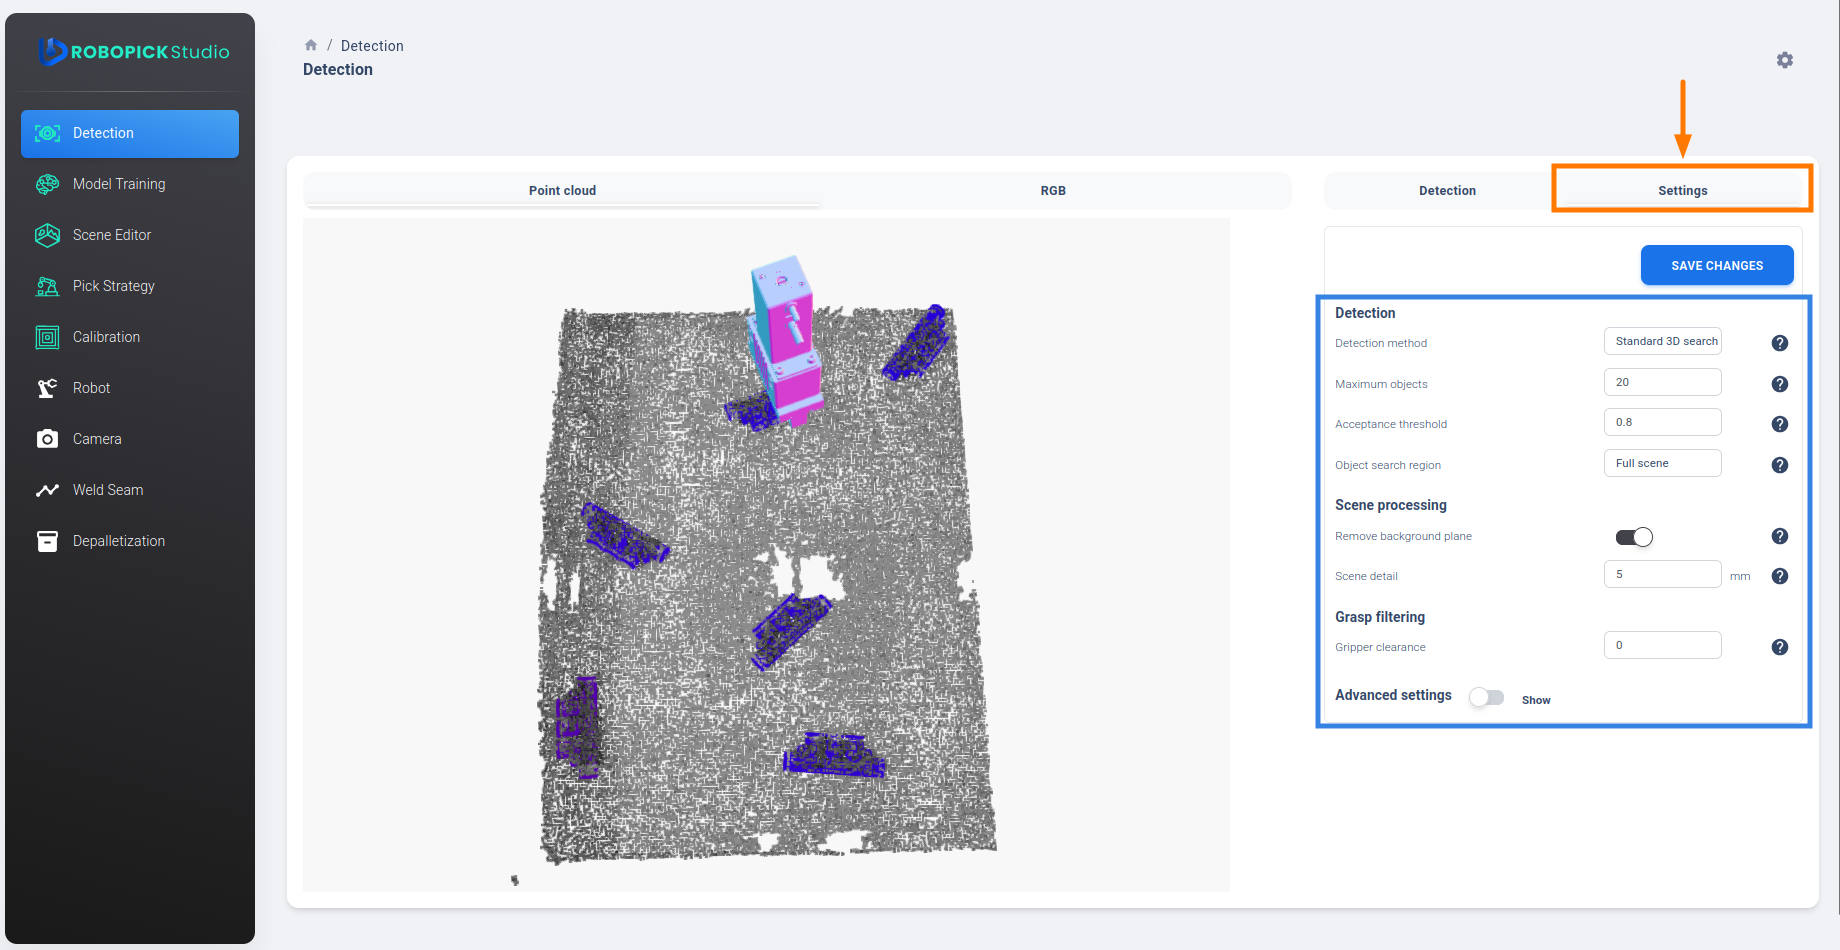
Some parameters are intended for advanced configuration and may require technical knowledge to adjust correctly. If you need assistance with parameter tuning, or if you are unsure which values to use, please contact Dault Robotics Support for guidance. The support team can help you identify suitable parameter values for your environment or assist with the configuration.