Installation
Camera Placement
Eye-to-hand
In this setup, the camera is mounted in a fixed location separated from the robot, for example, an aluminum profile, tripod, etc. In this scenario, make sure that the camera is mounted such that it has a clear view of the items to be picked.
Eye-in-hand
In this setup, the camera is mounted next to the robot end-effector with a flange. Make sure that the camera's flange is attached to the robot's end-effector flange, such that the camera should move with the robot's last link.
Electrical and Data Connection
- Connect the RoboPick PC to the power source.
- Connect the 3D camera to RoboPick PC with the provided camera cable.
- Connect the RoboPick PC to the robot's ethernet port.
- Connect the RoboPick PC to a screen with HDMI / display port.
- Connect the RoboPick PC to a keyboard and a mouse.
- Turn on the RoboPick PC.
- Open a browser and go to RoboPick's UI: http://localhost:3000.
Robot Connection
Yaskawa with YRC1000 controller
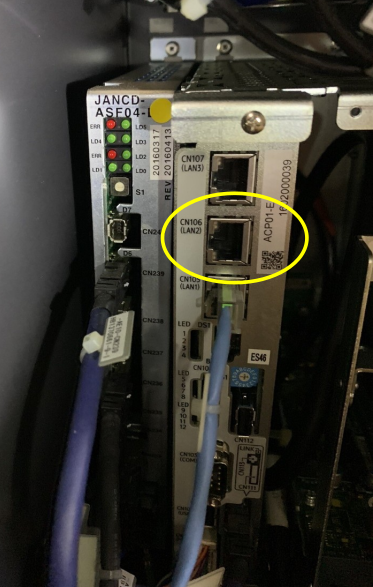
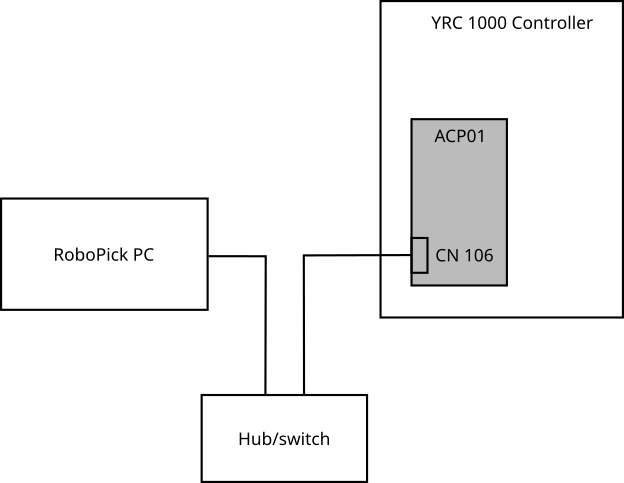
- Connect the ethernet cable to the controller's CN106 port.
- If the CN106 port is occupied, a hub/switch can be used. See figure below for CN106 port location and the network configuration.
MotoPlus Application Installation
The YRC1000 controller requires the RoboPick MotoPlus application to communicate with RoboPick.
Install the RoboPickMotoPlus.out application on the controller before connecting from the RoboPick UI.
- Copy
RoboPickMotoPlus.outto the root directory of a USB flash drive. - Turn off the YRC1000 controller.
- Start the controller in maintenance mode by holding Main Menu while turning on the controller.
- Set the security level to Management Mode.
- Insert the USB flash drive into the USB port on the back of the teach pendant.
- Open MotoPlus APL. > DEVICE.
- Set the target device to USB:Pendant.
- Open MotoPlus APL. > LOAD (USER APPLICATION).
- Select
RoboPickMotoPlus.out, then press Enter. - Select YES when the controller asks for confirmation.
- After the application is loaded, turn off the controller and wait at least 10 seconds.
- Turn on the controller normally.
Universal Robots
- Connect the ethernet cable to the Ethernet port on the Universal Robots Control Box.
- The Ethernet port is located on the underside of the Control Box bracket and is accessed through the cable opening at the base of the Control Box.
- On the teach pendant, open the network settings: Main menu > Settings > System > Network.
- Set the robot network method to Static Address.
All robots
- Configure the robot IP address so it is on the same subnet as the RoboPick PC.
For example:
- Robot IP:
192.168.1.10 - RoboPick PC IP:
192.168.1.20 - Subnet mask:
255.255.255.0
- Robot IP:
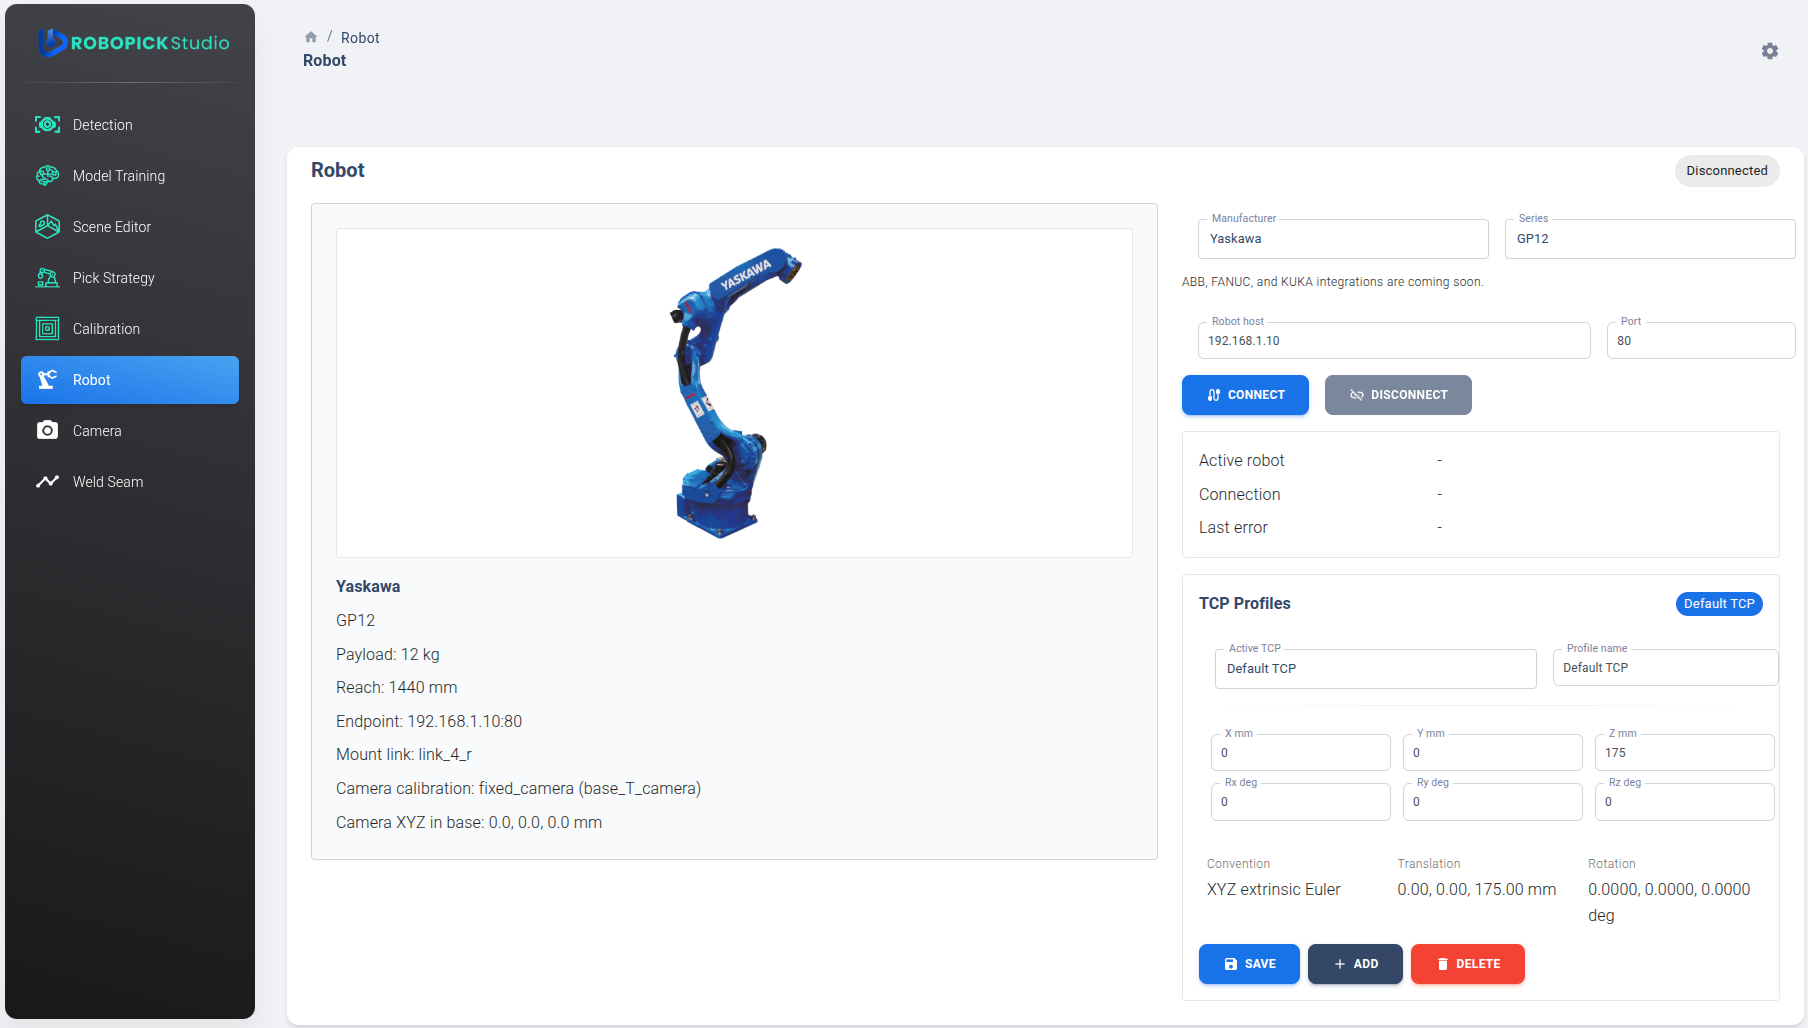
- Confirm that the RoboPick PC can reach the robot IP address. In RoboPick's UI go to: http://localhost:3000/robot.
- Choose the robot brand and type.
- Enter the IP address.
- Press connect.
- Verify that the connection status goes from "Disconnected" to "Connected".
Note: the product can still be used to test detection without robot connection.