Scene Editor
The Scene Editor is used to define the detection area and the geometric limits of the picking scene.
Overview
In the Scene Editor, you can configure which part of the camera view should be used for object detection. This helps RoboPick ignore irrelevant objects, robot fixtures, bin walls, and areas outside the intended picking region. By limiting the detection volume, a much faster detection time can be achieved.
Workflow
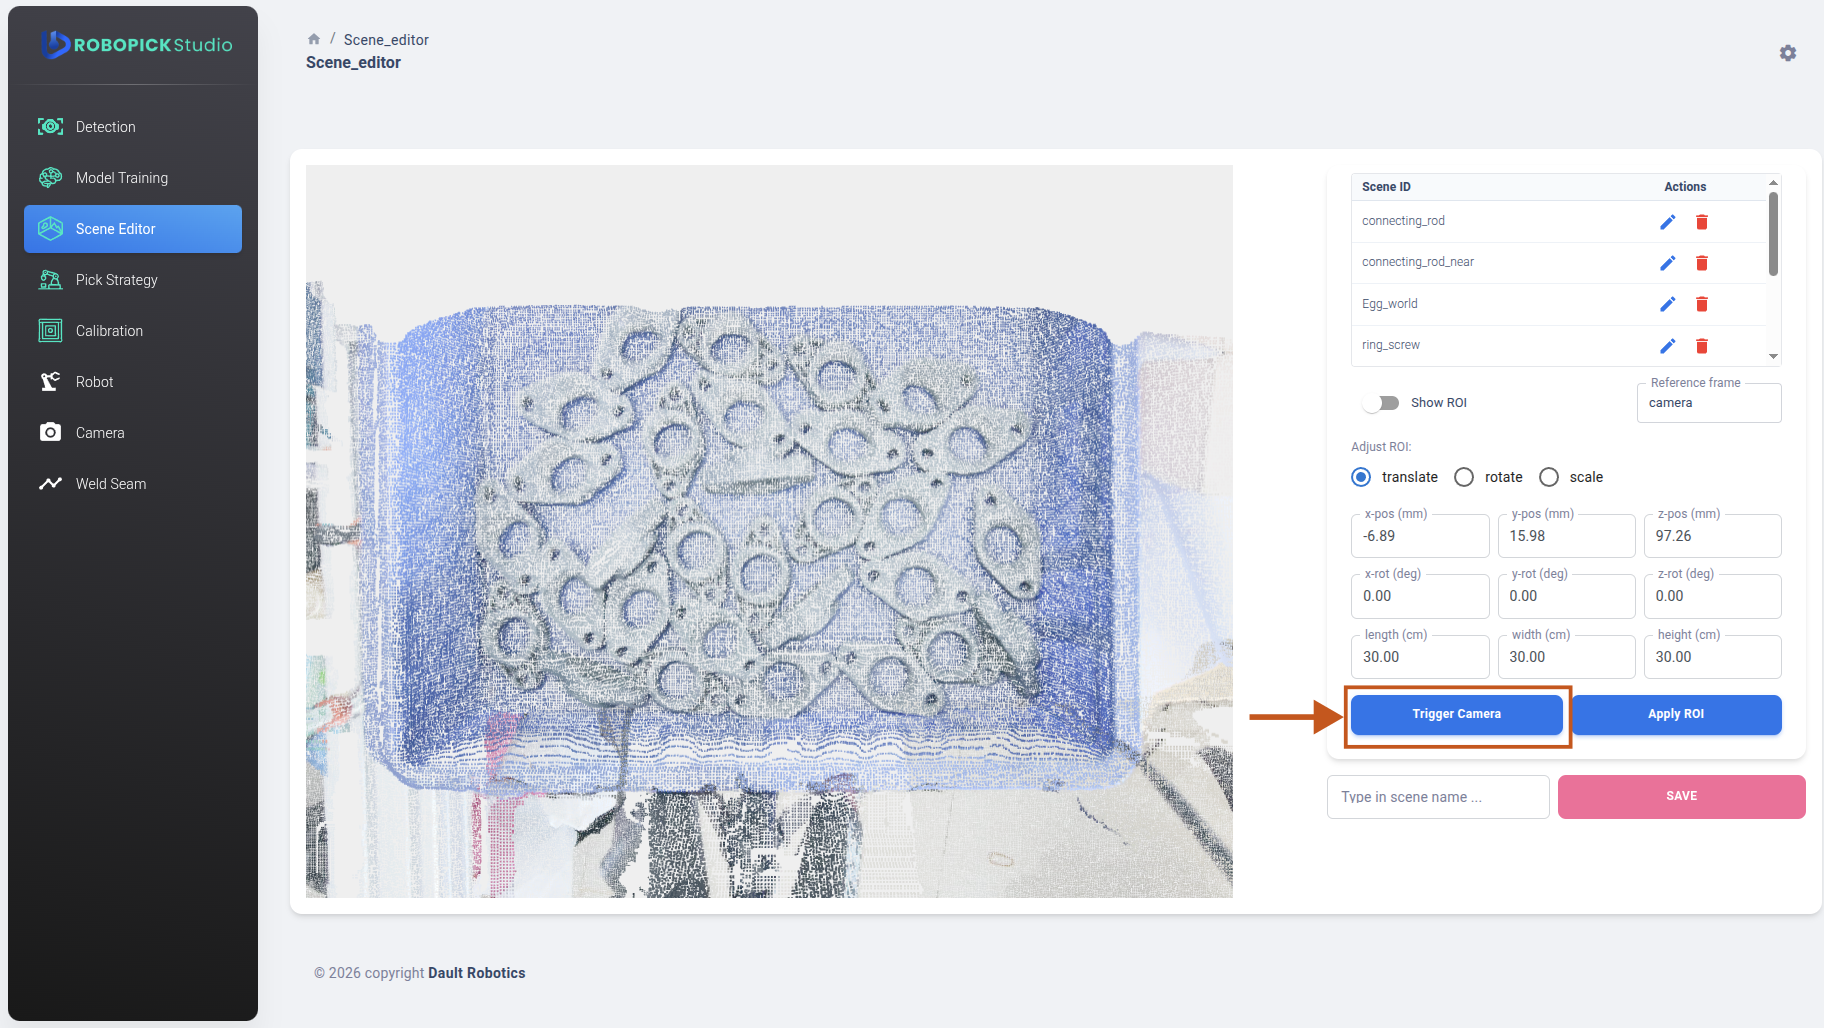
- Open RoboPick Studio and go to the Scene Editor page. Then, press Trigger Camera button. The captured point cloud will be displayed on the left viewer.
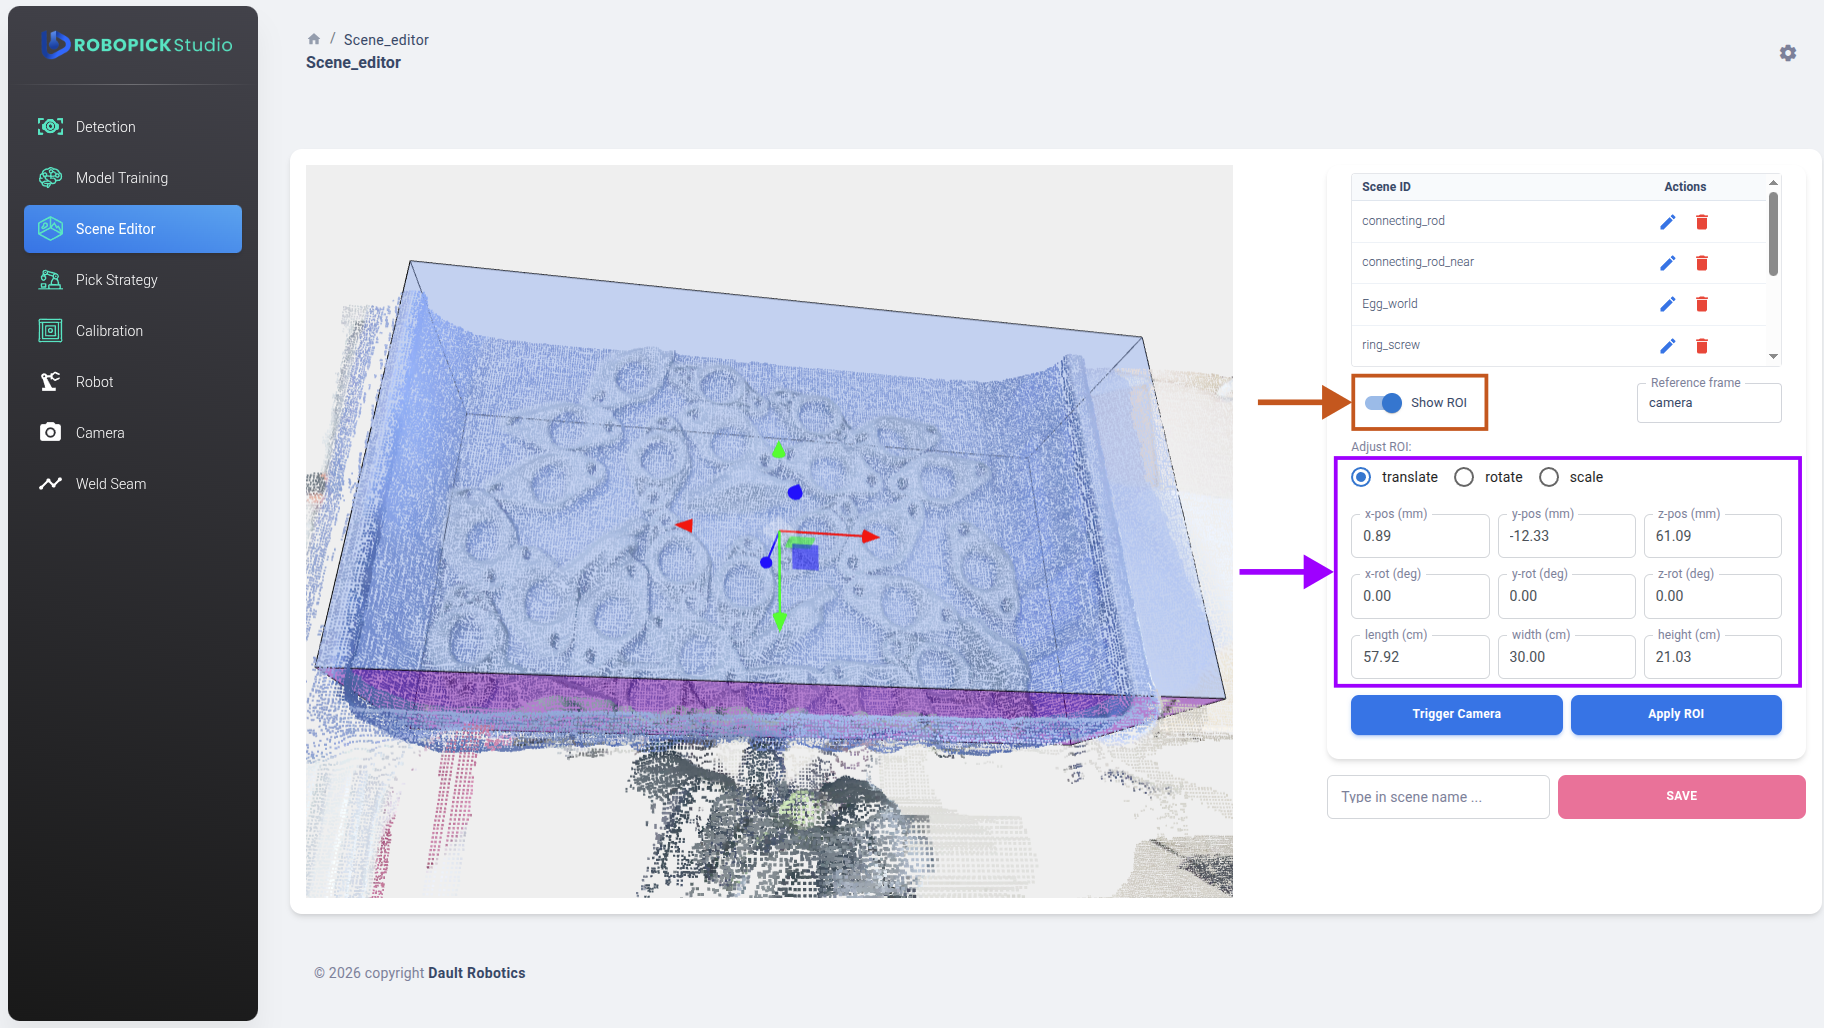
- Adjust the scene limits so they cover the expected object area. First, enable the Show ROI switch. A 3D ROI will appear on the point cloud viewer. You can adjust the position, orientation and the size of the ROI by dragging and dropping using your mouse/touch pad. Alternatively, you can also use the number fields indicated on Figure 2. Adjust the ROI to remove unwanted area such as outside of the source bin / pallet.
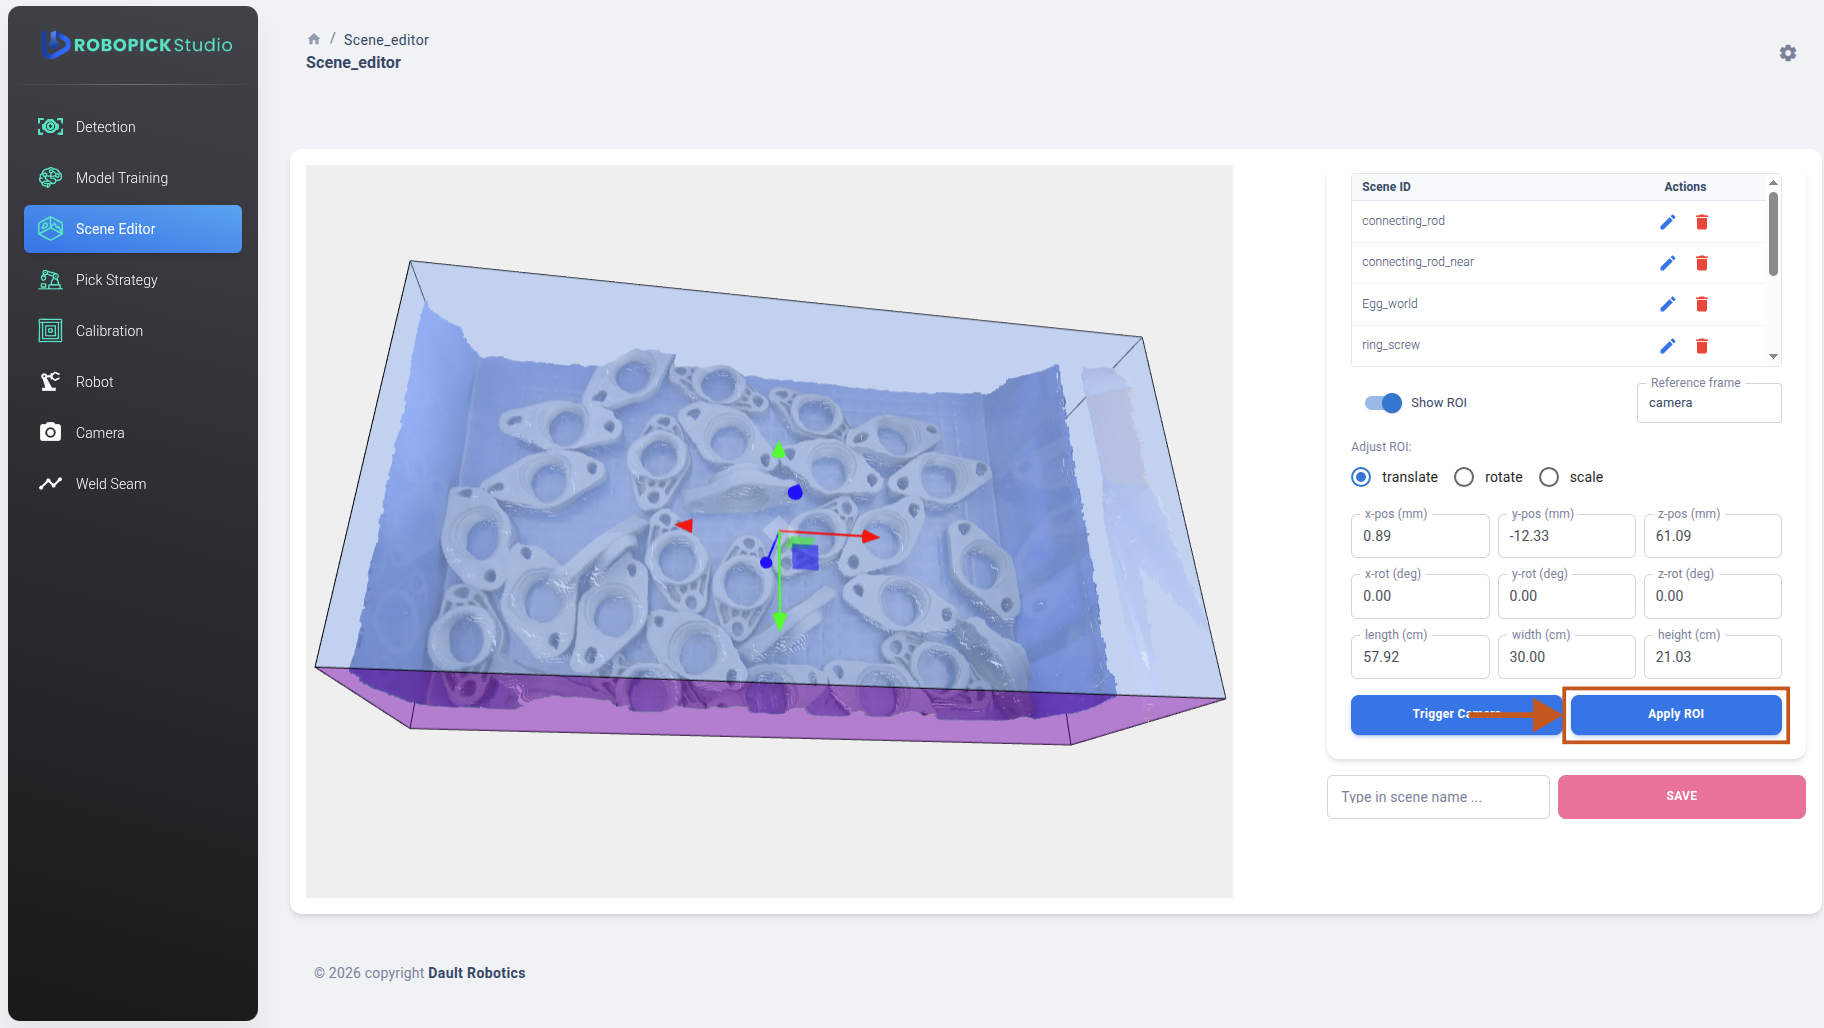
- Apply the ROI To see the effect of the ROI, press the Apply ROI button. This will results in cropped point cloud. This cropped cloud will be used by RoboPick during detection operation instead of the full point cloud.
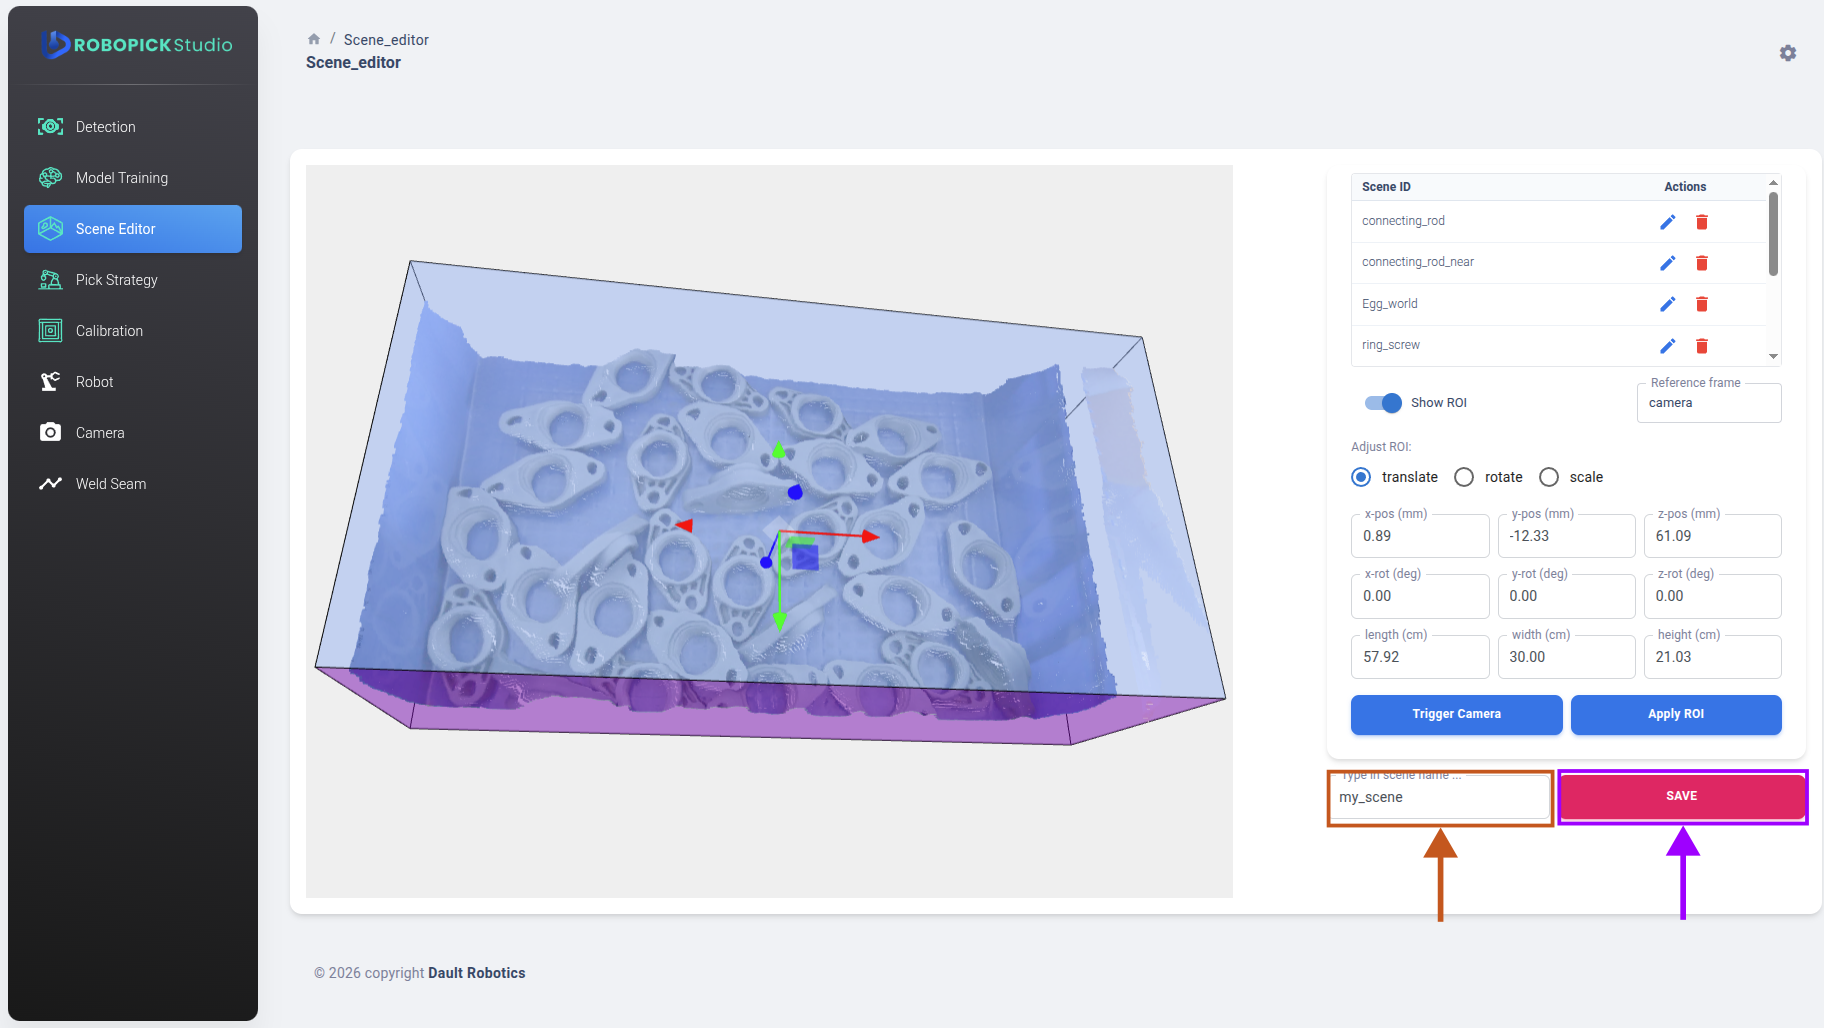
- Save the scene configuration.
Finally, fill in a unique scene id and press SAVE. The scene specification will be stored and can be later used during detection.
Editing and deleting saved scenes
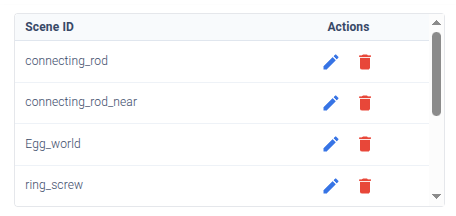
The stored scene will appear on the table located on the right. If desired, a scene can be edited or deleted.
After the scene is configured, proceed to the Pick Strategy page.